
Google Tag Manager is an essential tool for a digital marketer. With GTM, you can install and edit scripts and conversion trackers on your site without having to dig into the site’s code or make complex changes to individual pages. We will detail how to set up and give a site admin or editor user access to your Google Tag Manager account.
You can set up multiple accounts under your Google Account. Just as with account, you can set up multiple “containers”. You would set up multiple containers if you have an app, subdomain, or additional platform. This setup process is oriented to help a user on a desktop environment to set up GTM for a website.
How to set up a Google Tag Manager account
Step 1. Sign up for a Google Tag Manager account
If you haven’t already, sign up for a GTM account. You will need to have a Google account. This can be a personal Gmail, business email hosted by Google, or you can set up an account with your existing business email.
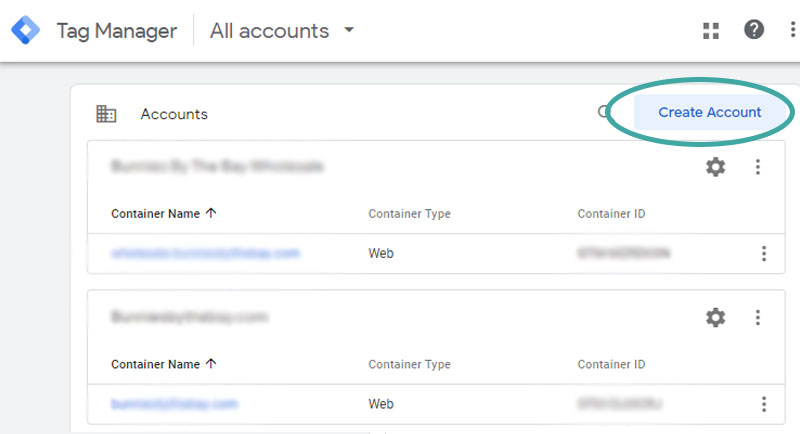
Step 2. Set up a site container/ account
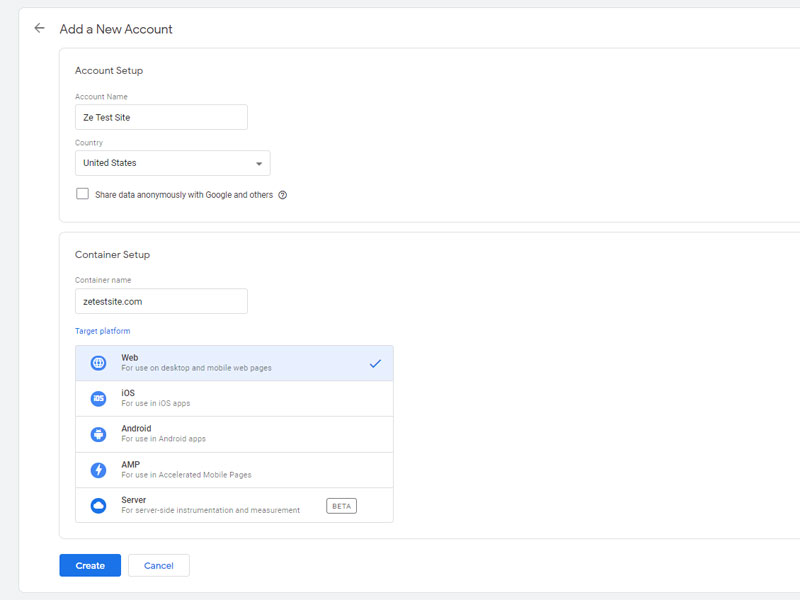
Click the “Create Account” button in the top-right of the Accounts screen. Add your site’s name, country, and domain name, then select whether you are installing it on a website, app, or another target platform. You will then need to accept the Terms of Service and be sure to click the checkbox accepting the Data Processing Terms as required by GDPR.
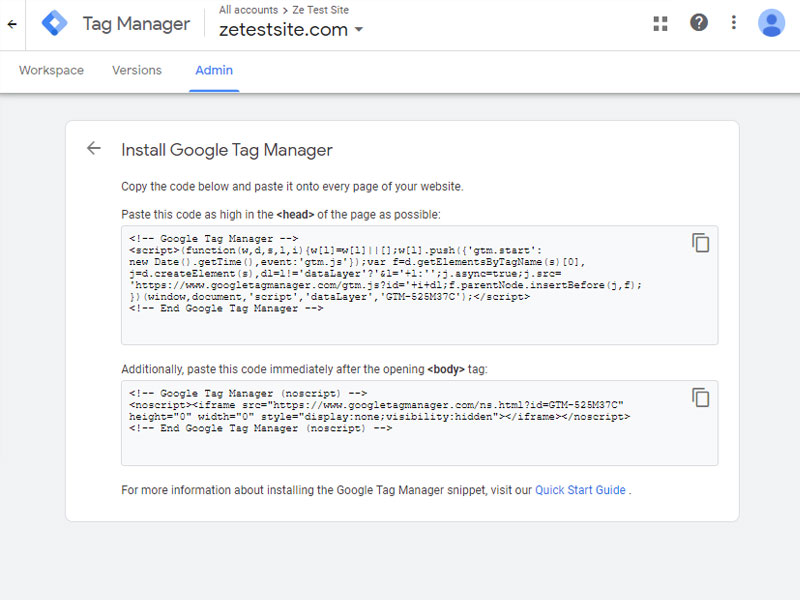
Step 3. Install Google Tag Manager
Google Tag Manager has two pieces of code that need to be installed on your site. The first code is a script that must be installed in the section of your HTML. There are different methods of installation based on your web host. The second code is an iframe that will trigger if the site visitor does not have javascript enabled. This second code should be inserted just beneath the opening tag.
If you don’t have much HTML experience, you may reach out to your developer for implementation. You can also reach out to Ethical Gains for a free consultation and tips on how to install Google Tag Manager.
How to set up user access to Google Tag Manager
Step 1. Open your domain’s account container.
Open your account container for the target site you are adding a user to. Refer to our setup guide you haven’t already set up a Google Tag Manager account.
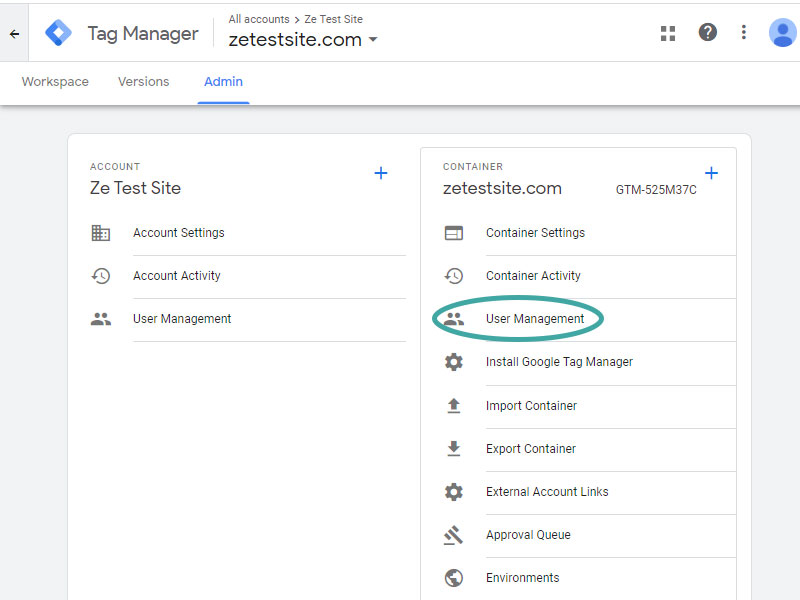
Step 2. Access the User Management menu
Open the Admin panel at the top-left of the screen. Click on User Management under the CONTAINER settings. This is where you can manage user access and permissions.
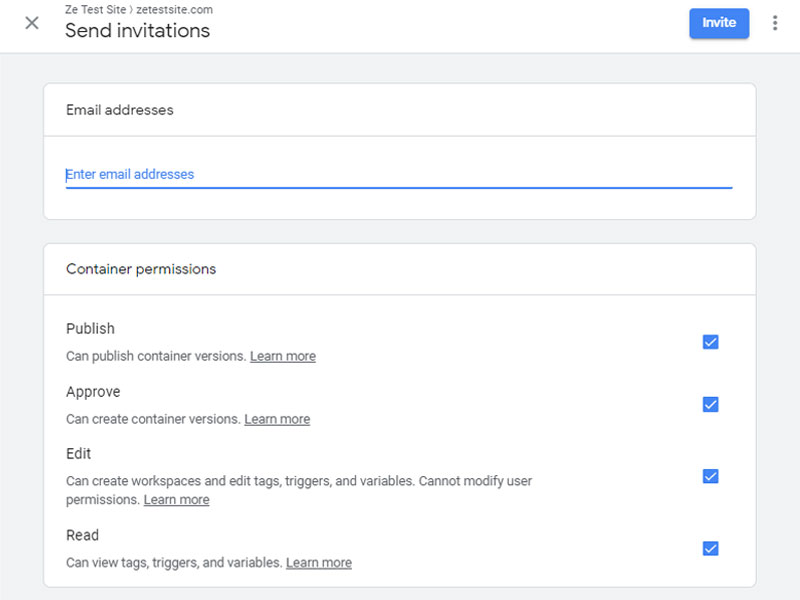
Step 3. Add a new account user
Click the blue button at the top-right of the screen and choose “Add users”. Enter the recipient’s email address and choose their level of Container Permissions. The permissions are listed in a hierarchy from most powerful to least powerful. If you are using Ethical Gains’ digital marketing services, then allow permission to Publish, which will populate the rest of the checkboxes.
You can also add User Groups if you need to add and manage permissions for a set of people.
Now you’re ready to add a user to your Google Tag Manager. Click the blue “Invite” button and an email will be sent to the new user to accept and access your container.
If you have any technical or marketing questions, be sure to reach out to us!